Tuesday, November 15, 2016

Back in business with the Panama Tee Dress: Pattern Testing Take 1 and 2


It's been ages since I last blogged about my sewing adventures. With all my good intentions, it's been nearly impossible to blog. Kudos to my fellow bloggers! It must be a full time job! I really lack the dedication and on top of that, I lack the time. Being a homeschool mom keeps me quite busy and my only free time is when my kids are at the homeschool co-op a couple of days a week. That's when I can sew, provided I don't have errands to run.


This little number is brought to you courtesy of Alina Sewing Design and Co. Alina is an indie pattern designer I discovered on Instagram. I bought her Chi-Town Chinos pattern this summer and never got around to sewing it. When she recently made a call for testing her upcoming Panama Tee and Dress pattern, I responded and was pleased to be selected. It's my first time testing a pattern! Yay me!!


The pattern is perfect for busy homeschooling moms like myself and calls for knits, which I've been sewing mostly because they're easy and quick to sew. Last but not least, I was happy to learn that Alina was homeschooled all the way through High school!
The Panama Tee and Dress pattern has 3 options. View A is a tee, view B is a knee-length dress and view C is a an ankle length maxi dress with a slightly flared hem. It also comes with a three sleeve length option:  short, half and long. I made the knee-length dress and the tee.


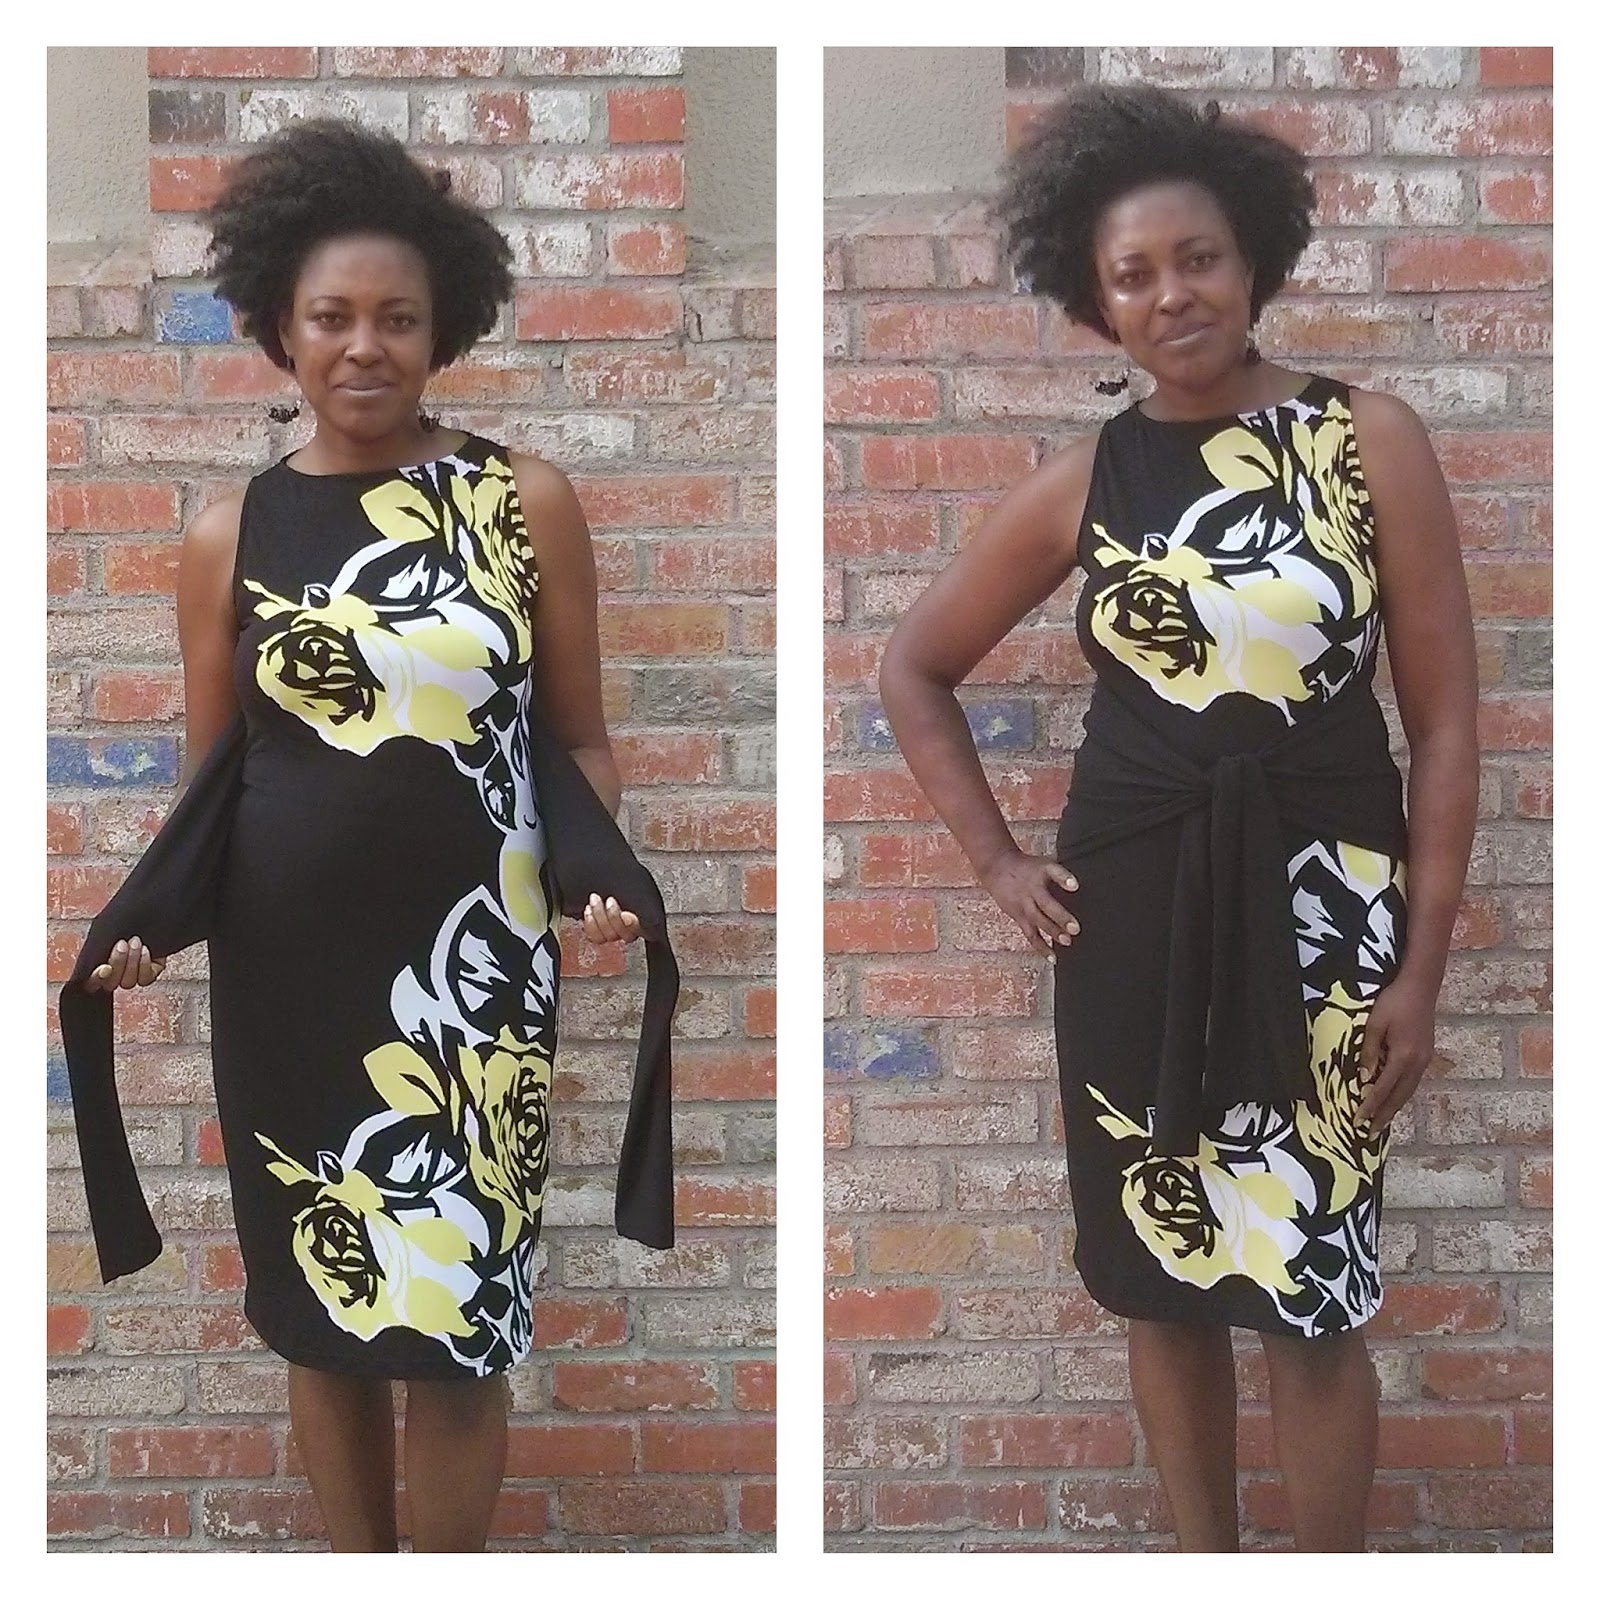
Take 1 is view B with half sleeve in a mystery knit I bought a while ago from the remnant table at Hancock Fabrics. Based on my measurements, I cut a 10 in the bust and hips and a 12 at the waist. With my fabric being a medium cotton spandex knit with a high stretch factor I had take about 1/2 inch from each sides. With heavier knit, I don't think I would need to remove anything from the width. I didn't make any major changes to the overall dress except for removing 1/2 inch from the sleeve cap. The bust as it is didn't bother me a highly stretchy knit but I am wondering if an FBA would be need with a heavier knit like ponte.


The fabric curled up like crazy which made sewing it challenging but is quite comfy to wear. I made a one and a half inch hem so the dress would be a little over my knees. I've worn the dress several time since finishing it and got many compliments. A long sleeve color blocked version is already cut and ready to sew.


My dress while not as loose as Alina intended it to be, is not fitted either. I kind of like it this way. Depending on the fabric you choose and your body type, this dress will not necessarily produce the same results.


Take 2 is view A, the Tee version is by far my favorite. Give me stripes and lace and I'm a happy camper I was inspired by a top I saw on shopbop.com. 
I used a striped rayon spandex knit and a black stretchy floral lace. If you follow me on Instagram you probably saw the early stages of the lace placement. It was fun but time consuming given the fact that the top itself is extremely quick to sew.


This time I chose the long sleeves and based on my measurements I cut an 8 in the bust and hips and a 10 at the waist. My knit was also stretchy so I had to take out an additional 1/2 inch from the sleeves starting at the elbow down to the wrist. I removed 3 inches from the long sleeve length and 2 inches from the bodice since I have a short torso.


The lace was topstitched down using a triple stretch stitch on my new and fancy Pfaff sewing machine. I love the back view of this top. I am really pleased with this pattern. I am planning on making a few more versions and can't wait to try the maxi dress.


To be honest, I didn't really follow the instructions since I've been sewing knits for as long as I can remember. I did however thoroughly read her instructions when I received the pattern and I can definitely attest they are very well written and contain a wealth of info and tips for beginners.


Thanks Alina for allowing me to test my first pattern! Be sure to check the Panama Tee and Dress pattern!


Monday, July 4, 2016

Vogue 1445 Dress Review: This wearable muslin is a keeper and Me Made May 2015 Recap


Well, it seems I can get enough of stripes! There's just something about them! Recently I bought the Vogue pattern 1445 by Pamela Rolland and could wait to sew it up.


My only concern was about the fit. I tend to shy away from shift dresses and this one was no exception. And it doesn't have side seams so adjustments will be tricky. I decided to sew a wearable muslin in a Ponte knit striped fabric that I had more than 3 yards of. I chose a striped fabric because by now you know I love playing around with stripes.
I also had an inspiration picture in mind. This Banana Republic dress I saw a few year back and wanted to replicate one day.

So I got to work on this pattern. I cut a size 12 but next time I will cut a 10. The instructions are pretty good(I realized it the hard way) except for a few things I did differently. I learned the hard way because after reading the instructions I thought I could bypass the hand sewing part as instructed and cut corners. I was wrong and had the undo the dress! The good thing though is that I was able to check the fit before taking it down and it sped up the process the second time around.


I used a black mesh knit to line the dress. Since I was using a ponte knit already I didn't want to use my usual knit lining for fear it would be too uncomfortable in the summer!
Construction was easier the second time.  I didn't have to do a whole lot of stripe matching for a change. I followed the instructions with the exception of the exposed zipper and how to attach the lining to the zipper and the hem.


I used a zipper from my stash so it's not as long as what the pattern calls for! Because I had checked the fit the first time, I know I need to cut a size 10 next time if I make it in a double knit fabric and maybe a 12 in a woven.
For the zipper, I used the trusted Pattern Runway tutorial. I really like it how straightforward it is!
I didn't slip stitched the lining to the zipper or the hem. I did it all by machine with the exception of slip stitching the hem facing to the dress before attaching the lining.


What drew me to this pattern is the interesting hem shape and the raised neckline. I like this shift dress so much I might change my mind and try sewing more of them. The pattern is well drafted. The armholes are just the right size. Not too low. The cut in shoulders are very flattering.
Only dislike might be the front opening. Even though it's interfaced tend to fall but that's probably because of the knit fabric choice.


 I see myself wearing this a lot this summer as it can be dress up and down. I wore it to church and got a lot of compliments. I want to make it again in a stretch woven maybe. I firmly believe this wearable muslin is a keeper! What say you?

Me Made May 2015 recap

Me Made May is almost over. The month of May went by fast! Here's a recap of what I wore this week.

Unblogged Band of Outsiders knock off dress.

Burdastyle top and skirt


Look who's Member in Focus on PR

Unblogged Burda cardigan and top

Quick and easy unselfish sewing for my middle one.

Unblogged self drafted dress.


Vogue 1445

Saturday, May 16, 2015

Vogue 1291 Pattern Review and Me Made May 2015 Round up.


This is an oldie but a goodie! I made it back in 2013 to take to PR Weekend San Francisco. Sandra Betzina was teaching the seminar that year. I learned a lot about fitting and Sandra is such a fun teacher and person.

The highlight of that day for me was Sandra's reaction when I greeted her.  She pointed to my top and said she liked how I used a matching lace for the sleeves. She made me turn around and said that I did a great job! Her comment made my day!
Now onto the pattern itself. It's the Vogue 1291.


I used a ponte knit with a matching mesh lace I bought at Haberman Fabrics before moving to CA. I cut the size D and it fits right out of the envelope. The instructions are very clear and I sewed it up in one day. 


I did add a modesty panel to avoid wearing a tank under this top. I just cut up a triangle of the ponte fabric sewed it to the bodice starting at the base of the sleeves up to a point where my bra is not showing. 


I hemmed it on my Juki blind hemmer. I wear this all the time and wonder why I haven't made more of these.


ME MADE MAY 2015


This month, I signed up for the Me Made May 2015 challenge over at sozowhatdoyouknow's blog. Here's my pledge:

'I, Paulinakoss Bruce from www.sewuthinkucan.blogspot.com, sign up as a participant of Me-Made-May '15. I endeavour to wear a me made garment each day for the duration of May 2015'.


It's my first time participating and I was excited about it! I take it as a personal incentive to try and finish some UFO's! I have a huge bin of them.


So without further ado, here's what I wore so far this month. Only a few days are missing because I didn't get the chance to take pictures. Oh well!

Unblogged dress but reviewed on Pattern Review


Jalie 3245 unblogged


Self drafted dress unblogged


McCalls 6078 unblogged


Sandra Betzina top.

Until next time.

Wednesday, May 13, 2015

McCalls 5621 Review: A DVF Colorblocked Top Knock off!


This is piece number 2 of my 2015 wardrobe. I am slowly but surely working toward building another summer wardrobe. This year, I am all about orange and pink and navy. 
Well, DVF set the tone with her Resort 2015 collection and I was sold! 
Those of you following me on Instagram might have seen my little sketches and all the fabrics I was able to find in my stash to create my summer color palette. 


Then, I got some more fabric during the PR weekend shopping day in the Los Angeles fashion district last month.


So, I started with the DVF knock off wrap dress and since I have some leftover fabric, I was determined to make something out of it. I went for another knock off. This time it was a colorblocked top from the same Resort 2015 DVF collection.
Out of 4 yards of matte jersey fabric from Gorgeous Fabrics, I squeezed out a wrap dress and a top. Isn't this stashbusting at its best?


I used McCalls 5621 view C with sleeves from view B which I extended. Making the entire neck band in the orange fabric would have been an overkill so my challenge was to cut the front neck band in two pieces so that only the front placket will be orange. 


The pattern instructions were okay. I did look online for front placket tutorials and found one that I used in combination with the pattern instructions. Sewing a neckband with a front placket can be tricky. My advice is to make sure you reinforce the corners of the bodice front by stay stitching or even fusing a little square of interfacing before clipping it to prevent distortion. I had to redo that part several times before getting it right. I was using a lightweight knit when the pattern actually calls for stable knits and woven fabrics. The front placket though it is interfaced is wobbly because of the type of fabric I used.


I need to add a snap so that my bra doesn't show when I'm bending. It's not too low but because of the fabric I think it tend to open up a bit when worn.
Lengthwise, the top is a little too short for my taste but since I didn't have enough fabric, I can't really complain!
The hem and sleeve bands were sewn in true DVF style, by folding under the seam allowance and stitch in the ditch between the band and the top.


Now to make some pink or navy shorts to go with it. Onward with the Summer wardrobe plans!